Microsoft officially announced the end of support for Windows 10 — meaning no more security updates, patches, or technical support. If you’re still using Windows 10 Pro, it’s time to upgrade to Windows 11 or another supported version to keep your system secure and running smoothly.
In this post, we’ll guide you step-by-step on how to upgrade your Windows 10 Pro system, even if it’s no longer supported for automatic upgrades.
Why You Need to Upgrade from Windows 10 Pro
Microsoft ends security updates for Windows 10 on October 14, 2025. After that, your PC becomes vulnerable to:
Security threats (malware, ransomware, viruses)
⚙️ Software incompatibility — newer apps may not install
Driver issues with newer hardware
Poor performance and system instability
If you depend on your PC for business or personal use, upgrading ensures your data stays safe and supported.
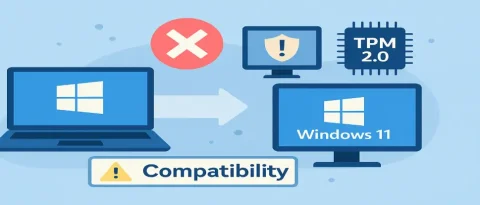
Option 1: Check if Your PC Supports Windows 11
Before upgrading, you’ll need to make sure your device can run Windows 11.
✅ System Requirements for Windows 11:
Processor: 1 GHz or faster with 2+ cores on a compatible 64-bit processor or SoC
RAM: 4 GB or more
Storage: 64 GB or larger
TPM: Trusted Platform Module (TPM) version 2.0
Secure Boot: Must be enabled
Graphics Card: Compatible with DirectX 12 or later
Display: HD (720p) or higher
Check compatibility using Microsoft’s PC Health Check tool:
Download the PC Health Check Tool
Option 2: Upgrade to Windows 11 Manually (Step-by-Step)
If your system is compatible, follow these steps:
Step 1: Backup Your Data
Before making any major upgrade, backup your important files using:
OneDrive
Google Drive
An external hard drive
Step 2: Get Windows 11 Installation Assistant
Download it directly from Microsoft:
Windows 11 Installation Assistant
Step 3: Run the Tool
Open the Installation Assistant and follow the on-screen instructions. It will guide you through downloading and installing Windows 11.
Step 4: Activate Windows 11
After installation, make sure to activate using your Windows 10 Pro key.
Go to Settings → System → Activation
Enter your Windows 10 Pro key if not automatically detected
Most valid Windows 10 Pro keys still activate Windows 11 Pro successfully.
Option 3: Clean Install (If Upgrade Fails)
If your system isn’t supported or the upgrade fails, you can do a clean installation using a USB drive.
Steps:
Download the Windows 11 ISO from Microsoft.
Use the Media Creation Tool to create a bootable USB drive.
Boot from the USB and install Windows 11 manually.
Enter your Windows 10 Pro key when prompted.
⚠️ This will erase your existing data, so make sure to back up everything first.
Alternative: Stay on Windows 10 with Extended Security Updates (ESU)
If your PC cannot upgrade to Windows 11, Microsoft offers Extended Security Updates (ESU) for businesses and critical users.
This allows you to keep receiving security patches for up to 3 more years (until 2028) — but you’ll need to pay a fee.
This is a temporary fix, not a long-term solution.
Option 4: Upgrade Your Device
If your PC doesn’t meet Windows 11 requirements (especially TPM 2.0 or Secure Boot), it might be time to upgrade your hardware.
Recommended specs for future-proofing:
8GB RAM or more
SSD drive
Intel 8th Gen or AMD Ryzen 2000 and above
Upgrading to a newer PC ensures full compatibility with Windows 11 and future versions.